Pulse Rate Sensor Using Arduino
Components
- Arduino
- Heart Beat sensor module
- 16x2 LCD
- Push button
- Bread board
- Power
- Connecting wires
Working of Heartbeat Monitor Project
Working of this project is quite easy but a little calculation for calculating heart rate is required. There are several methods for calculating heart rate, but here we have read only five pulses. Then we have calculated total heart beat in a minute by applying the below formula:
Five_pusle_time=time2-time1;
Single_pulse_time= Five_pusle_time /5;
rate=60000/ Single_pulse_time;
where time1 is first pulse counter value
time2 is list pulse counter value
rate is final heart rate.
When first pulse comes, we start counter by using timer counter function in arduino that is millis();. And take first pulse counter value form millis();. Then we wait for five pulses. After getting five pulses we again take counter value in time2 and then we substarct time1 from time2 to take original time taken by five pulses. And then divide this time by 5 times for getting single pulse time. Now we have time for single pulse and we can easily find the pulse in one minute, deviding 600000 ms by single pulse time.
Rate= 600000/single pulse time.
In this project we have used Heart beat sensor module to detect Heart Beat. This sensor module contains an IR pair which actually detect heart beat from blood. Heart pumps the blood in body which is called heart beat, when it happens the blood concentration in body changes. And we use this change to make a voltage or pulse electrically.
Circuit Diagram and Explanation
Circuit of heartbeat monitor is shown below, which contains arduino uno, heart beat sensor module, reset button and LCD. Arduino controls whole the process of system like reading pulses form Heart beat sensor module, calculating heart rate and sending this data to LCD. We can set the sensitivity of this sensor module by inbuilt potentiometer placed on this module.

Heart beat sensor module’s output pin is directly connected to pin 8 of arduino. Vcc and GND are connected to Vcc and GND. A 16x2 LCD is connected with arduino in 4-bit mode. Control pin RS, RW and En are directly connected to arduino pin 12, GND and 11. And data pin D4-D7 is connected to pins 5, 4, 3 and 2 of arduino. And one push button is added for resetting reading and another is used to start the system for reading pulses. When we need to count heart rate, we press start button then arduino start counting pulses and also start counter for five seconds. This start push button is connected to pin 7 and reset push button is connected to pin 6 of arduino with respect to ground.
Program Description
In code we have used digital read function to read output of Heart Beat sensor module and millis() fuction for calculating time and then calculate Heart Rate.
Before this we have initiazed all the components that we used in this project.
and here we have pullup the push button line by using software pullup.

Code:
#include<LiquidCrystal.h>
LiquidCrystal lcd(12, 11, 5, 4, 3, 2);
int in = 8;
int Reset=6;
int start=7;
int count=0,i=0,k=0,rate=0;
int Reset=6;
int start=7;
int count=0,i=0,k=0,rate=0;
unsigned long time2,time1;
unsigned long time;
unsigned long time;
byte heart[8] =
{
0b00000,
0b01010,
0b11111,
0b11111,
0b11111,
0b01110,
0b00100,
0b00000
};
{
0b00000,
0b01010,
0b11111,
0b11111,
0b11111,
0b01110,
0b00100,
0b00000
};
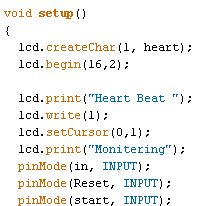
void setup()
{
lcd.createChar(1, heart);
lcd.begin(16,2);
lcd.print("Heart Beat ");
lcd.write(1);
lcd.setCursor(0,1);
lcd.print("Monitering");
pinMode(in, INPUT);
pinMode(Reset, INPUT);
pinMode(start, INPUT);
digitalWrite(Reset, HIGH);
digitalWrite(start, HIGH);
delay(1000);
}
{
lcd.createChar(1, heart);
lcd.begin(16,2);
lcd.print("Heart Beat ");
lcd.write(1);
lcd.setCursor(0,1);
lcd.print("Monitering");
pinMode(in, INPUT);
pinMode(Reset, INPUT);
pinMode(start, INPUT);
digitalWrite(Reset, HIGH);
digitalWrite(start, HIGH);
delay(1000);
}
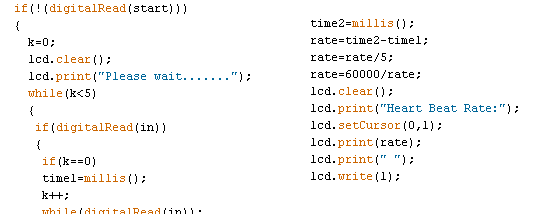
void loop()
{
if(!(digitalRead(start)))
{
k=0;
lcd.clear();
lcd.print("Please wait.......");
while(k<5)
{
if(digitalRead(in))
{
if(k==0)
time1=millis();
k++;
while(digitalRead(in));
}
}
time2=millis();
rate=time2-time1;
rate=rate/5;
rate=60000/rate;
lcd.clear();
lcd.print("Heart Beat Rate:");
lcd.setCursor(0,1);
lcd.print(rate);
lcd.print(" ");
lcd.write(1);
k=0;
rate=0;
}
if(!digitalRead(Reset))
{
rate=0;
lcd.clear();
lcd.print("Heart Beat Rate:");
lcd.setCursor(0,1);
lcd.write(1);
lcd.print(rate);
k=0;
}
}
{
if(!(digitalRead(start)))
{
k=0;
lcd.clear();
lcd.print("Please wait.......");
while(k<5)
{
if(digitalRead(in))
{
if(k==0)
time1=millis();
k++;
while(digitalRead(in));
}
}
time2=millis();
rate=time2-time1;
rate=rate/5;
rate=60000/rate;
lcd.clear();
lcd.print("Heart Beat Rate:");
lcd.setCursor(0,1);
lcd.print(rate);
lcd.print(" ");
lcd.write(1);
k=0;
rate=0;
}
if(!digitalRead(Reset))
{
rate=0;
lcd.clear();
lcd.print("Heart Beat Rate:");
lcd.setCursor(0,1);
lcd.write(1);
lcd.print(rate);
k=0;
}
}
Comments
Post a Comment